Fixing a Leaky Faucet: Easy DIY Tips
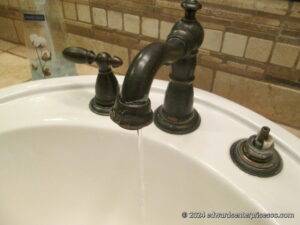
A leaky faucet can be more than just an annoyance; it can waste a significant amount of water and increase your utility bills. Fortunately, fixing a leaky faucet is a straightforward DIY task that you can tackle with a few basic tools and a bit of patience. Here’s a step-by-step guide to help you get started.
Tools You’ll Need:
- Adjustable wrench
- Screwdriver (Phillips and flathead)
- Replacement parts (O-rings, washers, or cartridges, depending on your faucet type)
- Plumber’s grease
- Rag or towel
Step-by-Step Guide:
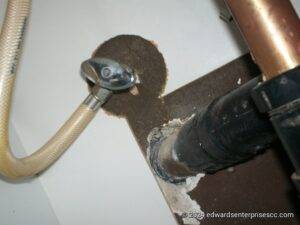
- Turn Off the Water Supply
- Locate the shut-off valves under the sink and turn them clockwise to close. If you can’t find these valves, turn off the main water supply to your home.
- Locate the shut-off valves under the sink and turn them clockwise to close. If you can’t find these valves, turn off the main water supply to your home.
- Plug the Drain
- Use a sink plug or a rag to block the drain. This prevents small parts from falling down the drain during the repair.
- Identify Your Faucet Type
- Faucets generally fall into four categories: compression, ball, cartridge, and ceramic disk. Identifying your faucet type will help you determine the correct repair method.
- Faucets generally fall into four categories: compression, ball, cartridge, and ceramic disk. Identifying your faucet type will help you determine the correct repair method.
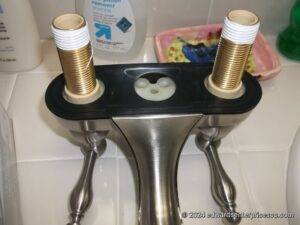
- Disassemble the Faucet
- Remove the handle by unscrewing the decorative cap and the screw underneath. Use an adjustable wrench to loosen the packing nut and remove the stem or cartridge.
- Remove the handle by unscrewing the decorative cap and the screw underneath. Use an adjustable wrench to loosen the packing nut and remove the stem or cartridge.
- Inspect and Replace Damaged Parts
- Check the O-rings, washers, and seals for wear and tear. Replace any damaged parts with new ones. For compression faucets, replace the rubber washers. For cartridge faucets, replace the cartridge if it’s worn out.
- Clean the Components
- Clean the valve seat and other components with a soft cloth and white vinegar to remove any mineral deposits.
- Reassemble the Faucet
- Apply plumber’s grease to the new O-rings and washers before reassembling the faucet. Tighten all the components securely but avoid over-tightening, which can cause damage.
- Turn the Water Supply Back On
- Slowly turn the water supply back on and check for leaks. If the faucet still leaks, you may need to recheck the assembly or consider replacing the entire faucet.
Tips for Success:
- Take Your Time: Rushing through the repair can lead to mistakes. Take your time to ensure each step is done correctly.
- Keep Parts Organized: Lay out the parts in the order you remove them to make reassembly easier.
- Consult Manufacturer Instructions: If you have the manual for your faucet, refer to it for specific instructions and part numbers.